1. Introduction
I’ve been watching many documentation websites and blogs make it easier for LLMs/AI to read content or copy and paste to your favorite AI tools - a great signal for the future of documentation websites.
I first saw this on Mintlify and thought it was a great idea, but never bothered implementing it. Since I’m refactoring my blog to the latest Astro version and saw the following tweet, I took the chance to implement it here.
having this in your docs is incredibly high signal pic.twitter.com/Z5HtOGEhu3
— Nathan Covey (@nathan_covey) July 15, 2025
We’ll also add automatic voice generation of the content, so your readers can listen to a short summary. Without further delay, let’s get started.
2. Add Markdown View & Copy buttons to your blog
While it looks easy at first, this was quite a challenge because I didn’t know Astro internals well enough to make it work. I’ll explain the steps I took and how you can do it too.
- My Astro blog uses MDX with custom components - how would I convert them to pure markdown?
- Should I just crawl my own page and convert it to markdown from HTML? That would also bring headers and other elements not related to content.
- How could I render the content in Astro without the runtime while preserving plugins I add for Remark, Shiki, etc., so it wouldn’t be a pain to maintain?
- What current tools do we have to convert HTML to Markdown?
- Astro MDX renders to HTML, so I still need to convert it to markdown.
After digging around, I found a way to do it (probably not the best but it works! 🥲) and I’ll explain it in the following sections.
2.1. MDX to Markdown
This is where I struggled the most. Crawling my own website felt heavy and I was looking for a “cleaner” way. I could also attempt to parse my raw MDX and “traverse” the tree to convert it to markdown, but I asked myself: This should be doable with Astro only, right? Well, yes, but it’s still experimental!
First I found this article: The terrible things I did to Astro to render MDX content in my RSS feed, which was somewhat what I needed, but we still needed a lot of boilerplate to make it work. However, at the end of the article I found a link to an Astro RFC that was exactly what I needed! Lucky me, this was already pushed as an experimental feature.
Let’s check the Astro Container Reference and see how we can use it to render the content. Based on this, here’s an example utility I created:
// lib/markdown/to-markdown.ts
import { getEntry, type CollectionEntry } from "astro:content";
import { experimental_AstroContainer as AstroContainer, type AstroContainerUserConfig } from "astro/container";
import { astroConfig } from "../../../astro.config.mjs";
import reactRenderer from "@astrojs/react/server.js";
import vueRenderer from "@astrojs/vue/server.js";
import mdxRenderer from "@astrojs/mdx/server.js";
import { render } from "astro:content";
import turndown from "turndown";
import turndownPluginGfm from "@joplin/turndown-plugin-gfm";
import CraftBox from "@components/CraftBox.astro";

export interface ToMarkdownProps {
  post: CollectionEntry<"blog">;
  request: Request;
}

export async function toMarkdown({ post, request }: ToMarkdownProps) {

  const container = await AstroContainer.create({
    astroConfig: astroConfig as AstroContainerUserConfig,
  });

  container.addServerRenderer({ renderer: vueRenderer, name: "@astrojs/vue" });
  container.addServerRenderer({ renderer: mdxRenderer, name: "@astrojs/mdx" });
  container.addServerRenderer({ renderer: reactRenderer, name: "@astrojs/react" });
  container.addClientRenderer({ name: "@astrojs/react", entrypoint: "@astrojs/react/client.js" })

  const entry = await getEntry("blog", post.id);

  if (!entry || entry.data.draft) {
    throw new Error("Post not found or it is a draft");
  }

  const { Content } = await render(entry);

  const html = await container.renderToString(Content, {
    request,
    props: {
      components: {
        CraftBox,
      }
    }
  });

  const turndownService = new turndown({ codeBlockStyle: "fenced" });

  // Parse Inline links
  turndownService.addRule("inlineLink", {
    filter: function (node: any, options: any) {
      return (
        options.linkStyle === "inlined" &&
        node.nodeName === "A" &&
        node.getAttribute("href")
      );
    },
    replacement: function (content: any, node: any) {
      var href = node.getAttribute("href").trim();
      var title = node.title ? ' "' + node.title + '"' : "";
      return "[" + content.trim() + "](" + href + title + ")\n";
    },
  });

  // Parse Fenced Code Blocks
  turndownService.addRule('fencedCodeBlock', {
    filter: function (node: any, options: any) {
      return (
        options.codeBlockStyle === 'fenced' &&
        node.nodeName === 'PRE' &&
        node.firstChild &&
        node.firstChild.nodeName === 'CODE'
      )
    },
    replacement: function (content: any, node: any, options: any) {
      var language = node.getAttribute("data-language") || ""
      return (
        "\n\n" + options.fence + language + "\n" +
        node.firstChild.textContent +
        "\n" + options.fence + "\n\n"
      )
    }
  })

  // Use Github flavored markdown
  turndownService.use(turndownPluginGfm.gfm);

  // Convert HTML to Markdown
  const markdown = turndownService.turndown(html);
 return markdown;
}
So what’s happening here? Let’s break it down in easy steps:
- Astro was previously using the runtime to render content, and the APIs were too tight to the runtime, so we could not use it to render content outside of the Astro context.
- Astro released the Astro Container, which is a way to render content outside of the Astro context, but it was still experimental.
- We pull our Astro config, create the container with the config, and add the necessary renderers to make it work.
- We get our blog entry and use the
renderfunction to get the content component. - Finally we render the content to HTML like Astro would do in a normal context, passing our custom components to the context and request if needed.
- Once we have the HTML, we can use the
turndownlibrary to convert it to markdown. - We create small inline rules to convert the inline links and fenced code blocks to markdown and retain the snippet’s original language.
- Finally we use GitHub flavored markdown to convert the HTML to markdown and return it as a string.
Yay! We did MDX → HTML → Markdown, now things just got easier!
2.2. Serving the Markdown
If you’re on Astro, this is probably a boring part. Simply add a new route next to your blog post route. Like so: src/pages/blog/[id].md.ts and add the following code:
import { getCollection, type CollectionEntry } from 'astro:content'
import type { APIRoute } from 'astro'
import { toMarkdown } from "@lib/markdown/to-markdown";

export async function getStaticPaths() {
	const posts = await getCollection('blog')
	return posts.map((post) => ({
		params: { id: post.id },
		props: post,
	}))
}

export const GET: APIRoute = async ({ props, request }) => {
	try {
		const markdown = await toMarkdown({ post: props as CollectionEntry<"blog">, request });
		return new Response(markdown, {
			headers: {
				'Content-Type': 'text/markdown; charset=utf-8',
			},
		});
	} catch (error) {
		console.error(error);
		return new Response('Error', { status: 500 });
	}
}
This should be more than enough to serve the markdown version of your blog post - simply add the .md extension to your blog post route and it should just work!
2.3. Add the buttons to your blog post
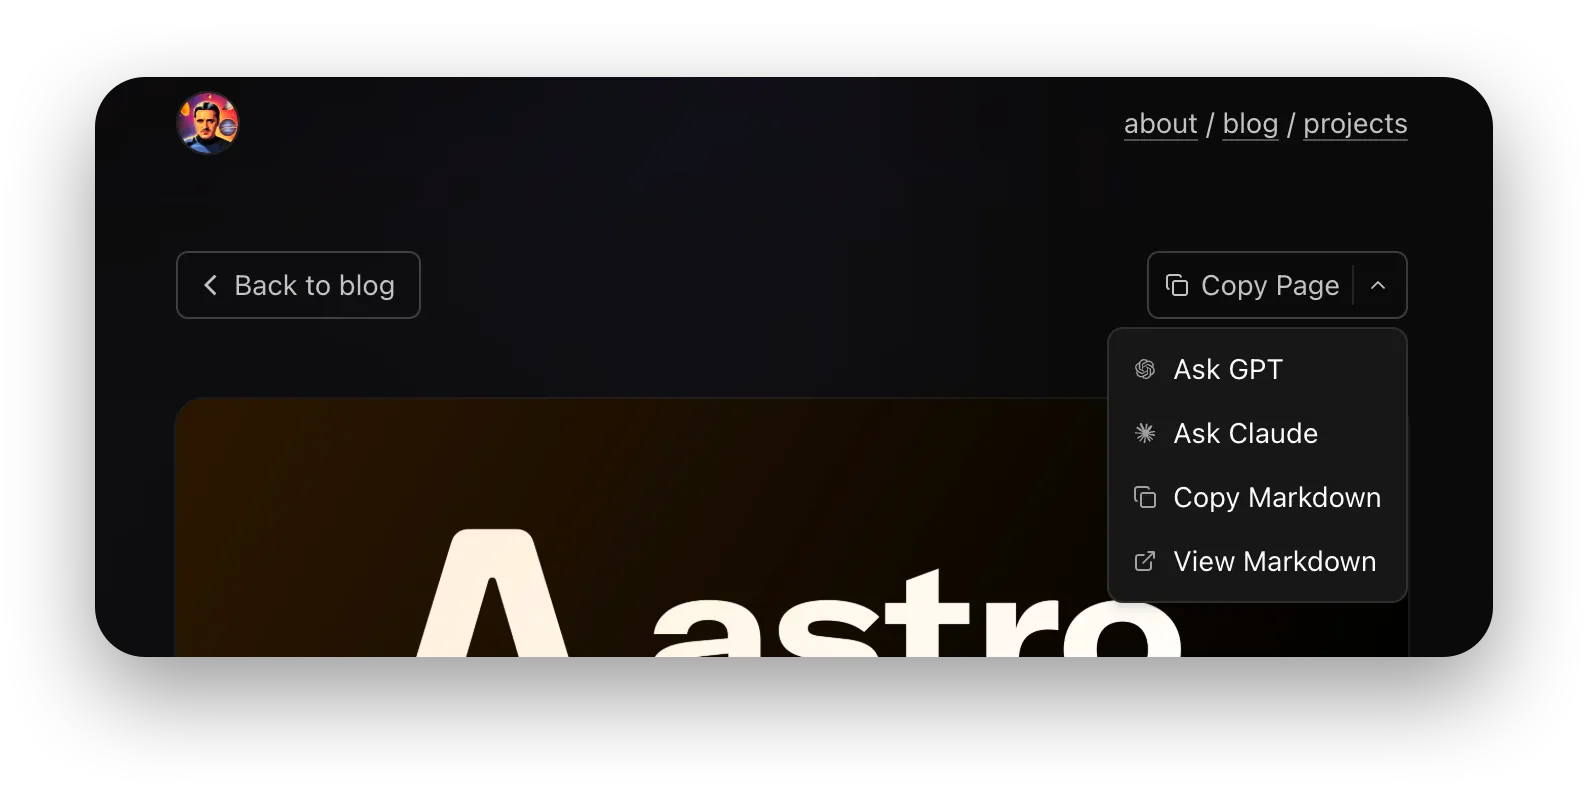
Now that we have the markdown version of our blog post, we can add the buttons to it. For this I used the shadcn/ui dropdown menu component.
I’ve removed the icons to keep it simple, but you can add them back if you want. Also there’s an issue with the dropdown menu with Astro Transitions - watch the issue for more details.
import { useState, type SVGProps } from "react";
import {
  DropdownMenu,
  DropdownMenuContent,
  DropdownMenuItem,
  DropdownMenuTrigger,
} from "./ui/dropdown-menu";

interface BlogActionsDropdownReactProps {
  url: string;
}

export default function BlogActionsDropdownReact({ url }: BlogActionsDropdownReactProps) {
  const [copyStatus, setCopyStatus] = useState<string>("Copy Markdown");

  const [dropdownOpen, setDropdownOpen] = useState(false);

  const fetchMarkdown = async () => {
    try {
      const response = await fetch(url);
      if (response.ok) {
        const content = await response.text();
        return content;
      }
    } catch (error) {
      console.error("Failed to fetch markdown content:", error);
    }
  };


  const handleAskGPT = () => {
    const content = encodeURIComponent('Please read the contents from the following link so i can ask question about it: ' + url);
    const chatGptUrl = `https://chatgpt.com/?q=${content}`;
    window.open(chatGptUrl, "_blank", "noopener,noreferrer");
  };

  const handleAskClaude = () => {
    const content = encodeURIComponent('Please read the contents from the following link so i can ask question about it: ' + url);
    const chatClaudeUrl = `https://claude.ai/new?q=${content}`;
    window.open(chatClaudeUrl, "_blank", "noopener,noreferrer");
  };

  const handleCopyMarkdown = async () => {
    const markdownContent = await fetchMarkdown();
    if (!markdownContent) {
      setCopyStatus("Failed");
      return;
    }
    try {
      await navigator.clipboard.writeText(markdownContent);
      setCopyStatus("Copied!");
      setTimeout(() => {
        setCopyStatus("Copy Markdown");
      }, 2000);
    } catch (error) {
      console.error("Failed to copy to clipboard:", error);
    }
  };

  const handleViewMarkdown = () => {
    window.open(url, "_blank", "noopener,noreferrer");
  };

  return (
    <DropdownMenu open={dropdownOpen} onOpenChange={setDropdownOpen}>
      <DropdownMenuTrigger
        onClick={() => setDropdownOpen((val) => !val)}
        className="not-prose group relative flex w-fit flex-nowrap rounded-sm border border-black/15 py-1.5 px-2 transition-colors duration-300 ease-in-out hover:bg-black/5 hover:text-black focus-visible:bg-black/5 focus-visible:text-black dark:border-white/20 dark:hover:bg-white/5 dark:hover:text-white dark:focus-visible:bg-white/5 dark:focus-visible:text-white text-sm items-center justify-center gap-1.5">
        <div className="flex items-center justify-center gap-1.5 divide-x divide-border">
          <div className="flex items-center justify-center gap-1.5 pr-1.5">
            <IconCopy className="size-3" />
            <span>Copy Page</span>
          </div>
          <div className="flex items-center justify-center gap-1.5">
            <IconChevronDown className="size-3 transition-transform duration-300 ease-in-out group-data-[state=open]:rotate-180" />
          </div>
        </div>
      </DropdownMenuTrigger>
      <DropdownMenuContent align="end" className="min-w-[8rem]">
        <DropdownMenuItem onClick={handleAskGPT}>
          <IconOpenai className="size-3" />
          <span>Ask GPT</span>
        </DropdownMenuItem>
        <DropdownMenuItem onClick={handleAskClaude}>
          <IconClaude className="size-3" />
          <span>Ask Claude</span>
        </DropdownMenuItem>
        <DropdownMenuItem onClick={handleCopyMarkdown}>
          <span>{copyStatus}</span>
        </DropdownMenuItem>
        <DropdownMenuItem onClick={handleViewMarkdown}>
          <span>View Markdown</span>
        </DropdownMenuItem>
      </DropdownMenuContent>
    </DropdownMenu>
  );
}
And that’s it! With this in place, you can add the button to your blog post page, and it should just work!
We have:
- Copy markdown to your clipboard
- Serve the Markdown version of your blog post
- Add a link to GPT & Claude to ask questions about the content
Here is how it looks like:
3. Voice Summary
Now that we have the markdown version of our blog post, it’s time to add a voice summary. While this is probably overkill, I had some fun doing it, so I’ll share it with you.
This involves 4 steps:
- Summarize the raw content of the blog post using OpenAI & ai-sdk
- Generate the voice summary using ElevenLabs or Murf
- Generate & save the voice summary to a file
- Add the voice summary to your blog post
3.1 - Summarize the raw content of the blog post
This is probably the easiest part if you’re familiar with Vercel SDK, so I’ll just jump right into the code. I’ve tweaked the prompt to output the summary in a more natural way - feel free to tweak it to your liking or suggest how I can make it better.
// lib/voice/summarizer.ts
import { generateObject } from 'ai';
import { createOpenAI } from '@ai-sdk/openai';
import { z } from 'zod';
import { env } from '../../env';

export interface SummaryOptions {
  tone?: 'professional' | 'casual' | 'engaging';
  focusAreas?: string[];
  includeKeyPoints?: boolean;
}

export interface Metadata {
  title: string;
  description?: string;
  tags?: string[];
}

export async function summarize(
  mdxContent: string,
  metadata: Metadata,
  options: SummaryOptions = {}
) {

  const {
    tone = 'engaging',
    focusAreas = [],
  } = options;

  const openaiProvider = createOpenAI({ apiKey: env.OPENAI_API_KEY });
  const model = openaiProvider('gpt-4o-mini');

  const systemPrompt = `You are Albert, an expert summarizer.
Your task is to:
1. Create a concise, engaging summary that flows well when spoken aloud.
2. Maintain the key technical concepts and insights
3. Use natural speech patterns and transitions
4. Keep the ${tone} tone throughout
5. MAXIMUM 3000 characters AND 250 words.
${focusAreas.length > 0 ? `6. Focus particularly on: ${focusAreas.join(', ')}` : ''}

The summary should be suitable for text-to-speech conversion and provide value to listeners who want to quickly understand the main points of the article, but without compromising the quality of the content.

You may use the following format to add pauses: [pause 1s]

Here are some important rules to following:

- Make sure you dont miss any important comparisons or insights, like if we talk about Frameworks, make sure you mention them correctly.
- While code snippets are important, you can can skip the code and explain briefly what they do.
- Always talk in third person, like you are the narrotor for nikuscs blog post.
- Dont use fancy words, keep the language simple, natural and easy to understand by the readers.
- Users will not "listen" the article, they will read it and listen to the summary.
- Avoid adding weird or special characters to the summary like: In this insightful blog post titled \"Tresjs + Vue - Holographic Sticker,\"
- Attempt to replace characters like: Tresjs + Vue - Holographic Sticker with natural words like: Tresjs and Vue - Holographic Sticker. ( This is a good example but be smart about other types thay maybe follow)
- If twitter/x URLS or other links are in the content, attempt to mention them in the summary by their names.
- For Frameworks or weird namings or words you can ( but not always need to ) use the pronunciation dictionary as you see fit like: "React" -> "Ree Act", only if it makes sense.

Please summarize the following blog post:

**Title:** ${metadata.title}
${metadata.description ? `**Description:** ${metadata.description}` : ''}
${metadata.tags ? `**Tags:** ${metadata.tags.join(', ')}` : ''}

**Content:**
${mdxContent}
`;

  try {
    const { object } = await generateObject({
      model,
      prompt: systemPrompt,
      schema: z.object({
        summary: z.string().describe('A natural, conversational summary suitable for audio that flows well when spoken aloud. MAXIMUM 3000 characters AND 250 words.'),
      }),
    });

    const summary = object.summary;
    const originalLength = mdxContent.length;
    const compressionRatio = ((originalLength - summary.length) / originalLength) * 100;

    return {
      summary,
      originalLength,
      summaryLength: summary.length,
      compressionRatio: Math.round(compressionRatio * 100) / 100,
    };
  } catch (error) {
    console.error('❌ Error summarizing content:', error);
    throw new Error(`Failed to summarize content: ${error instanceof Error ? error.message : 'Unknown error'}`);
  }
}
3.2 - Generate the voice summary
Initially I was thinking about using ElevenLabs, but I found they’re now subscription-based. While I used most of the free credits while testing, I didn’t feel like subscribing to ONE more AI service just for generating casual voice summaries. So I implemented ElevenLabs, but also Murf which offers a pay-as-you-go model.
It’s clear to me that ElevenLabs outputs are much better, but for this case, it serves the purpose.
Check the Murf implementation for more details, as it contains a pronunciation dictionary for the most common words in tech - this was also a fun challenge to implement.
// lib/voice/client.elevenlabs.ts
export interface ElevenLabsVoiceOptions {
  voiceId?: string;
  modelId?: string;
  stability?: number;
  similarityBoost?: number;
  style?: number;
  useSpeakerBoost?: boolean;
}

export interface VoiceSettings {
  stability: number;
  similarity_boost: number;
  style?: number;
  use_speaker_boost?: boolean;
}

export class ElevenLabsClient {
  private readonly apiKey: string;
  private readonly baseUrl = 'https://api.elevenlabs.io/v1';

  constructor(apiKey: string) {
    this.apiKey = apiKey;
  }

  async generate(
    text: string,
    options: ElevenLabsVoiceOptions = {}
  ): Promise<ArrayBuffer> {
    const {
      voiceId = 'JBFqnCBsd6RMkjVDRZzb',
      modelId = 'eleven_turbo_v2_5',
      stability = 0.5,
      similarityBoost = 0.5,
      style = 0,
      useSpeakerBoost = true,
    } = options;

    const url = `${this.baseUrl}/text-to-speech/${voiceId}`;

    const requestBody = {
      text,
      model_id: modelId,
      voice_settings: {
        stability,
        similarity_boost: similarityBoost,
        style,
        use_speaker_boost: useSpeakerBoost,
      },
    };

    try {
      const response = await fetch(url, {
        method: 'POST',
        headers: {
          'Accept': 'audio/mpeg',
          'Content-Type': 'application/json',
          'xi-api-key': this.apiKey,
        },
        body: JSON.stringify(requestBody),
      });

      if (!response.ok) {
        const errorText = await response.text();
        throw new Error(`ElevenLabs API error: ${response.status} ${response.statusText} - ${errorText}`);
      }

      const arrayBuffer = await response.arrayBuffer();
      return arrayBuffer;
    } catch (error) {
      console.error('❌ Error generating speech with ElevenLabs:', error);
      throw new Error(`ElevenLabs TTS failed: ${error instanceof Error ? error.message : 'Unknown error'}`);
    }
  }
}
// lib/voice/client.murf.ts
export interface MurfVoiceOptions {
voiceId?: string;
speed?: number;
pitch?: number;
volume?: number;
emphasis?: 'strong' | 'moderate' | 'reduced';
pauseLength?: number;
style?: string;
}
export interface MurfSpeechRequest {
text: string;
voiceId: string;
audioFormat?: 'mp3' | 'wav' | 'flac';
sampleRate?: number;
bitRate?: number;
speed?: number;
pitch?: number;
volume?: number;
emphasis?: 'strong' | 'moderate' | 'reduced';
pauseLength?: number;
style?: string;
pronunciationDictionary?: Record<string, { type: string; pronunciation: string }>;
}
export interface MurfSpeechResponse {
audioFile: string;
contentType?: string;
duration?: number;
size?: number;
}
export class MurfClient {
private readonly apiKey: string;
private readonly baseUrl = 'https://api.murf.ai/v1';
constructor(apiKey: string) {
this.apiKey = apiKey;
}
async generate(
text: string,
options: MurfVoiceOptions = {}
): Promise<ArrayBuffer> {
const {
voiceId = 'en-US-charles',
speed = 0.8,
pitch = 1.0,
volume = 1.0,
emphasis = 'moderate',
pauseLength = 0.5,
style = 'calm'
} = options;
const requestBody: MurfSpeechRequest = {
text,
voiceId,
speed,
pitch,
volume,
emphasis,
pauseLength,
style,
pronunciationDictionary: {
'js': { type: "SAY_AS", pronunciation: "jay ess" },
'ts': { type: "SAY_AS", pronunciation: "tee ess" },
'html': { type: "SAY_AS", pronunciation: "H T M L" },
'css': { type: "SAY_AS", pronunciation: "C S S" },
'json': { type: "SAY_AS", pronunciation: "jay son" },
'yaml': { type: "SAY_AS", pronunciation: "yammel" },
'vue': { type: "SAY_AS", pronunciation: "view" },
'nuxt': { type: "SAY_AS", pronunciation: "nuhkst" },
'react': { type: "SAY_AS", pronunciation: "ree act" },
'angular': { type: "SAY_AS", pronunciation: "ang you lar" },
'svelte': { type: "SAY_AS", pronunciation: "svelt" },
'vite': { type: "SAY_AS", pronunciation: "vite" },
'tailwind': { type: "SAY_AS", pronunciation: "tail wind" },
'shadcn': { type: "SAY_AS", pronunciation: "shad sea en" },
'threejs': { type: "SAY_AS", pronunciation: "three jay ess" },
'nestjs': { type: "SAY_AS", pronunciation: "nest jay ess" },
'nextjs': { type: "SAY_AS", pronunciation: "next jay ess" },
'next.js': { type: "SAY_AS", pronunciation: "next jay ess" },
'vue.js': { type: "SAY_AS", pronunciation: "view jay ess" },
'laravel': { type: "SAY_AS", pronunciation: "la ruh vell" },
'express': { type: "SAY_AS", pronunciation: "ex press" },
'tsx': { type: "SAY_AS", pronunciation: "T S X" },
'jsx': { type: "SAY_AS", pronunciation: "J S X" },
'dom': { type: "SAY_AS", pronunciation: "dee oh em" },
'cpu': { type: "SAY_AS", pronunciation: "C P U" },
'gpu': { type: "SAY_AS", pronunciation: "G P U" },
'sdk': { type: "SAY_AS", pronunciation: "S D K" },
'api': { type: "SAY_AS", pronunciation: "A P I" },
'cli': { type: "SAY_AS", pronunciation: "see ell eye" },
'gh': { type: "SAY_AS", pronunciation: "gee aitch" },
'ci': { type: "SAY_AS", pronunciation: "C I" },
'cd': { type: "SAY_AS", pronunciation: "C D" },
'http': { type: "SAY_AS", pronunciation: "H T T P" },
'https': { type: "SAY_AS", pronunciation: "H T T P S" },
'ai': { type: "SAY_AS", pronunciation: "A I" },
'ml': { type: "SAY_AS", pronunciation: "M L" },
'ui': { type: "SAY_AS", pronunciation: "you eye" },
'ux': { type: "SAY_AS", pronunciation: "you ex" },
'sql': { type: "SAY_AS", pronunciation: "sequel" },
'npm': { type: "SAY_AS", pronunciation: "N P M" },
'pnpm': { type: "SAY_AS", pronunciation: "P N P M" },
'yarn': { type: "SAY_AS", pronunciation: "yarn" },
'tresjs': { type: "SAY_AS", pronunciation: "tres jay ess" },
},
};
try {
const response = await fetch(`${this.baseUrl}/speech/generate`, {
method: 'POST',
headers: {
'Content-Type': 'application/json',
'api-key': this.apiKey,
'Accept': 'application/json',
},
body: JSON.stringify(requestBody),
});
if (!response.ok) {
const errorText = await response.text();
throw new Error(`Murf API error: ${response.status} - ${errorText}`);
}
const data: MurfSpeechResponse = await response.json();
const audioResponse = await fetch(data.audioFile);
if (!audioResponse.ok) {
throw new Error(`Failed to download audio: ${audioResponse.status}`);
}
const audioBuffer = await audioResponse.arrayBuffer();
return audioBuffer;
} catch (error) {
console.error('❌ Error generating speech with Murf:', error);
throw new Error(`Murf TTS failed: ${error instanceof Error ? error.message : 'Unknown error'}`);
}
}
}So, we have both clients. Now let’s create the TTS entry point that would pick one or another.
// lib/voice/tts.ts
import { ElevenLabsClient } from './client.elevenlabs';
import { MurfClient } from './client.murf';
import { env } from '../../env';

export type TTSProvider = 'elevenlabs' | 'murf';

export interface TTSOptions {
  provider?: TTSProvider;
  voiceId?: string;
  speed?: number;
  pitch?: number;
  volume?: number;
}

export interface TTSResult {
  audioBuffer: ArrayBuffer;
  provider: TTSProvider;
  size: number;
}

export async function generate(
  text: string,
  options: TTSOptions = {}
): Promise<TTSResult> {
  const { provider = 'murf' } = options;

  console.log(`🎤 Generating TTS with ${provider}...`);

  let audioBuffer: ArrayBuffer;

  try {
    switch (provider) {
      case 'murf':
        const murfClient = new MurfClient(env.MURF_API_KEY);
        audioBuffer = await murfClient.generate(text, {
          voiceId: options.voiceId ?? 'en-US-charles',
          speed: options.speed ?? 1.0,
          pitch: options.pitch ?? 1.0,
          volume: options.volume ?? 1.0,
        });
        break;

      case 'elevenlabs':
        const elevenLabsClient = new ElevenLabsClient(env.ELEVENLABS_API_KEY);
        audioBuffer = await elevenLabsClient.generate(text, options);
        break;

      default:
        throw new Error(`Unsupported TTS provider: ${provider}`);
    }

    return {
      audioBuffer,
      provider,
      size: audioBuffer.byteLength,
    };
  } catch (error) {
    console.error(`❌ TTS generation failed with ${provider}:`, error);
    throw new Error(`TTS generation failed: ${error instanceof Error ? error.message : 'Unknown error'}`);
  }
}
3.3 - Generate & Save the voice summary to a file
So we have both clients implemented. Now let’s generate the voice summary for each of our blog posts. For simplicity, I created a command to generate them, skipping the ones that already exist. This is done before I run the deploy for each article I write.
This file will take care of the following:
- Parse the MDX files in the blog directory
- Call the summarizer
- Pass the summary to the TTS client
- Save the voice summary to a file in the public directory
You can add it to your package.json scripts if needed like: voice:generate with bun run src/lib/voice/command.ts
// lib/voice/command.ts
#!/usr/bin/env bun
import { readFileSync, writeFileSync, mkdirSync, existsSync, readdirSync } from 'fs';
import { join, dirname } from 'path';
import { fileURLToPath } from 'url';
import { generate } from './tts';
import { summarize } from './summarizer';

const __filename = fileURLToPath(import.meta.url);
const __dirname = dirname(__filename);

const BLOG_DIR = join(__dirname, '../../../src/content/blog');
const AUDIO_DIR = join(__dirname, '../../../public/audio/blog');

interface BlogPost {
  id: string;
  data: {
    title: string;
    description: string;
    date: string;
    draft?: boolean;
    tags?: string[];
    cover?: string;
  };
}

function parseMDX(content: string): BlogPost['data'] {
  const frontmatterMatch = content.match(/^---\n([\s\S]*?)\n---/);
  if (!frontmatterMatch) {
    throw new Error('No frontmatter found');
  }

  const frontmatter = frontmatterMatch[1];
  const data: any = {};

  // Parse key-value pairs
  const lines = frontmatter.split('\n');
  for (const line of lines) {
    const trimmedLine = line.trim();
    if (!trimmedLine || trimmedLine.startsWith('#')) continue;

    if (trimmedLine.endsWith(':')) {
      continue;
    }

    if (trimmedLine.startsWith('- ')) {
      const value = trimmedLine.slice(2).trim();
      if (!data.tags) data.tags = [];
      data.tags.push(value);
      continue;
    }

    const match = trimmedLine.match(/^(\w+):\s*(.*)$/);
    if (match) {
      const [, key, value] = match;
      if (key === 'draft') {
        data[key] = value === 'true';
      } else {
        data[key] = value.replace(/^["']|["']$/g, '');
      }
    }
  }

  return data;
}

function getContent(): BlogPost[] {
  const posts: BlogPost[] = [];
  const blogDirs = readdirSync(BLOG_DIR, { withFileTypes: true })
    .filter(dirent => dirent.isDirectory())
    .map(dirent => dirent.name);

  for (const dirName of blogDirs) {
    const postPath = join(BLOG_DIR, dirName, 'index.mdx');
    if (existsSync(postPath)) {
      try {
        const content = readFileSync(postPath, 'utf-8');
        const data = parseMDX(content);
        posts.push({
          id: dirName,
          data
        });
      } catch (error) {
        console.warn(`⚠️  Failed to parse ${dirName}:`, error);
      }
    }
  }

  return posts;
}

async function generateAudioForPost(post: BlogPost): Promise<void> {
  const audioFilePath = join(AUDIO_DIR, `${post.id}.mp3`);

  if (existsSync(audioFilePath) && !process.argv.includes('--force')) {
    console.log(`⏭️  Skipping ${post.id} - audio file already exists`);
    return;
  }

  try {
    console.log(`🎙️ Processing: ${post.data.title}`);

    const mdx = readFileSync(join(BLOG_DIR, post.id, 'index.mdx'), 'utf-8');
    const summary = await summarize(
      mdx,
      {
        title: post.data.title,
        description: post.data.description,
        tags: post.data.tags,
      },
      { tone: 'engaging' }
    );

    console.log(`🤖 AI Summary Result:`, {
      originalLength: mdx.length,
      summaryLength: summary.summaryLength,
      compressionRatio: Math.round(((mdx.length - summary.summaryLength) / mdx.length) * 100),
      summary: summary.summary,
    });

    const audio = await generate(summary.summary, { provider: 'murf' });

    writeFileSync(audioFilePath, new Uint8Array(audio.audioBuffer));

    console.log(`✅ Generated: ${audioFilePath} (${(audio.size / 1024 / 1024).toFixed(2)} MB)`);

  } catch (error: any) {
    console.error(`❌ Error processing ${post.id}:`, error.message);
    if (process.argv.includes('--continue-on-error')) {
      console.log('⏩ Continuing with next post...');
      return;
    }
    throw error;
  }
}

async function main() {
  console.log('🎙️ Starting AI-powered voice generation for blog posts...');
  if (!existsSync(AUDIO_DIR)) {
    mkdirSync(AUDIO_DIR, { recursive: true });
    console.log('📁 Created audio directory:', AUDIO_DIR);
  }

  try {
    const posts = getContent();
    console.log(`📚 Found ${posts.length} blog posts`);
    for (const post of posts) {
      await generateAudioForPost(post);
    }
    console.log('✅ Voice generation completed successfully!');
  } catch (error) {
    console.error('❌ Error during voice generation:', error);
    process.exit(1);
  }
}

main().catch(console.error);
3.4 - Add the voice summary to your blog post
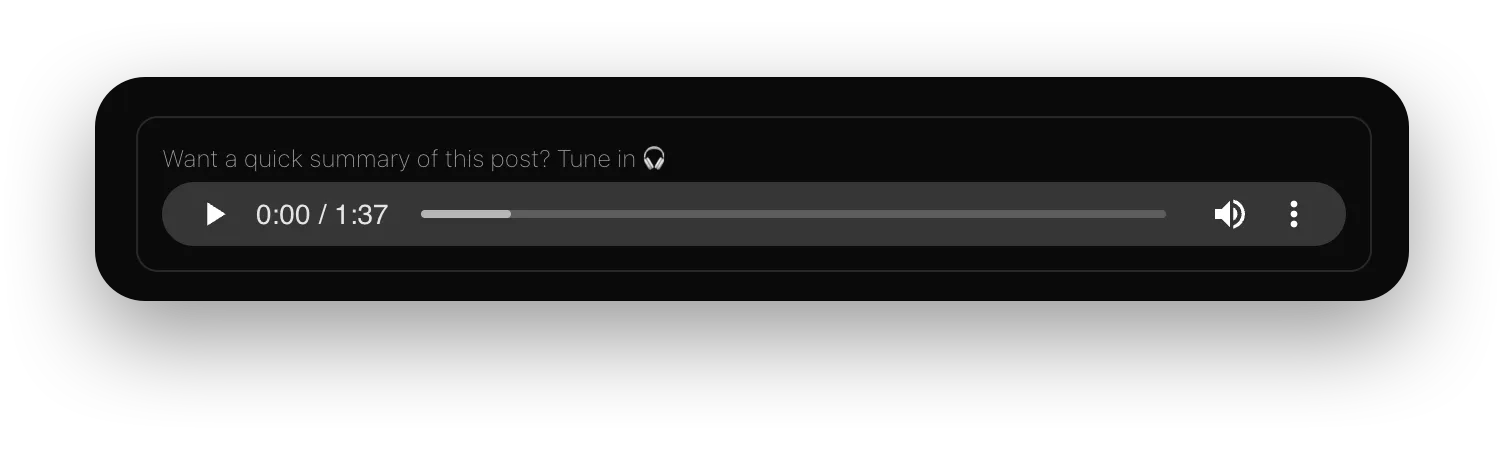
Now that we have the voice file generated, we can add it to our blog post. A simple component to do this would be:
---
interface Props {
  postId: string;
  title?: string;
}

const { postId } = Astro.props;
const audioUrl = `/audio/blog/${postId}.mp3`;
---

<div class="ring-input/80 my-6 rounded-lg p-3 ring">
  <div class="flex flex-col items-start justify-start gap-1">
    <div class="text-muted-foreground text-xs font-thin">Want a quick summary of this post? Tune in 🎧</div>
    <audio controls preload="metadata" class="h-8 w-full self-start" src={audioUrl}>Your browser does not support the audio element.</audio>
  </div>
</div>
That’s it! Now you also have a voice summary of your blog post, and you can add it to your blog post page.
Here is how it looks like:
4. Conclusion
This was a fun challenge to work on, and I hope you enjoyed it. If you have any questions, feel free to ask me on Twitter. Astro is indeed a great framework for blogging, and I’m glad to see it’s getting more traction!
5. Resources
- Astro Container Reference
- Astro RFC
- Turndown
- Turndown Plugin GFM
- ElevenLabs
- Murf
- Vercel SDK
- ai-sdk
- shadcn/ui
- codetv.dev